
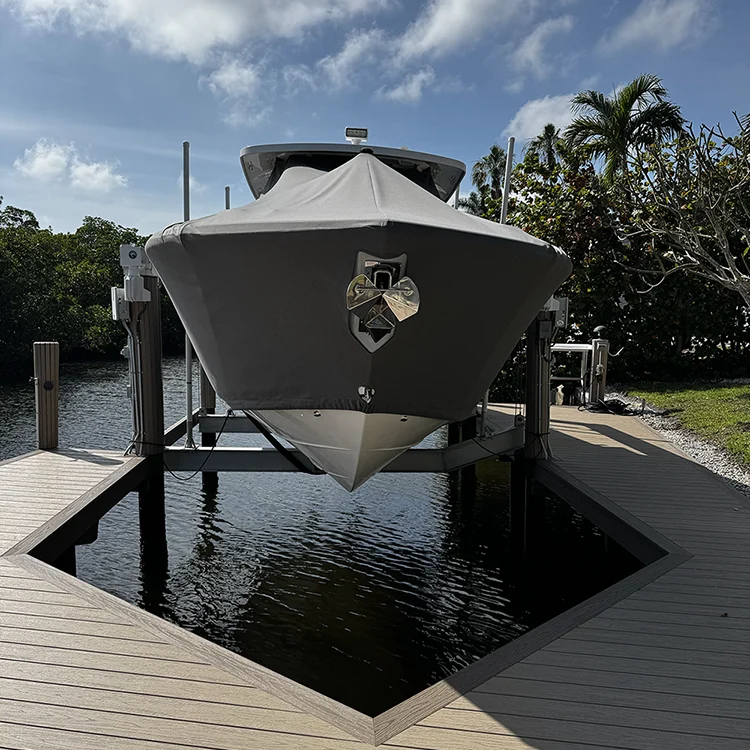
If you only use your boat a few times once the air cools off, it is very easy to keep putting this off. But when you winterize a boat properly, you are not just guarding against a rare cold night in Naples or Bonita Springs, you are preventing stale fuel, mildew, corrosion, and the kind of spring repair bill that ruins a launch day.
What winterizing a boat actually protects you from
A boat can look perfectly fine tied up in Marco Island and still be quietly getting worse. Water hides in low spots, fuel breaks down, salt lingers on hardware, and closed-up cabins turn into mildew boxes faster than most owners expect.
Freeze damage gets the attention, and for good reason. Water expands when it freezes, which can crack fittings, hoses, pumps, and engine components. But the catch is that winterizing is just as much about moisture control and storage protection. If your boat sits unused for weeks or months, stale fuel, corroded terminals, moldy upholstery, and a sour-smelling bilge can be every bit as annoying as a split plumbing line.
What you’ll need before you start
Before touching a drain, filter, or hose, get your supplies together and pull up the exact procedures for your boat. On a 25- to 55-foot vessel, the time drain is never the work itself. It is stopping halfway through because one system is different than expected.
Your owner’s manual and engine-specific instructions
Your manual is not optional. Inboards, outboards, sterndrives, generators, air conditioning loops, freshwater pumps, water heaters, and heads all have their own quirks. A raw-water-cooled engine and a closed-cooled engine may sit side by side at the marina and need different winterizing steps.
If your setup includes multiple engines or a generator, it helps to make a handwritten checklist system by system. That same habit pays off later with routine service too, especially if you keep up with how often your boat should be serviced.
Basic winterizing supplies
You will usually need fuel stabilizer, marine/RV antifreeze, oil and filters, fuel filters, gear lube or transmission fluid as required, lubricant for fittings and hinges, moisture absorbers, rags, cleaners, hose adapters, and basic battery tools. If your manual calls for fogging oil, have that ready too.
Use marine antifreeze, not automotive coolant, in freshwater and storage-related winterizing steps. That distinction matters.
A quick reality check: DIY or schedule service
If your boat is a larger cruiser with twin engines, generator, air conditioning, multiple heads, or a long list of plumbing accessories, professional service is often the smarter move. Time matters, but missed details matter more.
If you want a good framework for choosing outside help, it helps to understand what a good service provider should actually handle. A simple center console is one thing. A 45-foot cruiser with several hidden systems is another.
Step 1: pick the right timing and make a simple game plan
- Choose a date before storage gets rushed.
- Block enough time to finish the full job.
- Write down every system onboard before you begin.
Winterizing goes badly when it becomes a last-minute chore the night before a cold front.
Winterize before the first hard cold spell
- Do it before the first real cold snap, not after.
- Treat early-season storage as your trigger.
- Plan even in Southwest Florida.
Even warm-climate owners should not assume they can skip prep. Before the first hard freeze is the safe rule, and that still applies when occasional cold weather sneaks into Naples or Bonita Springs.
Decide where the boat will sit
- Confirm whether your boat will stay in a slip, on a lift, in dry storage, on a trailer, or indoors.
- Adjust your cover, ventilation, and battery plan to match.
- Make drainage part of the storage decision.
A boat left in a wet slip needs closer rainwater and bilge monitoring. A boat on a lift needs good cover support and airflow. Indoor storage is easier on finishes and electronics, but moisture can still build up if the cabin is sealed too tightly.
Step 2: clean and dry the boat before it sits
- Remove anything that can rot, stain, or trap moisture.
- Wash the boat thoroughly.
- Dry every compartment before covering it up.
This part feels boring. It is also one of the biggest difference-makers.
Clean the interior, galley, and compartments
Take off every food item, damp towel, drink mix, paper product, and spare bag that can absorb moisture. Wipe down counters, vinyl, drawers, and locker interiors. A clean cabin is not just nicer in spring, it is far less likely to smell like an old cooler left in the sun.
Wash the exterior and protect key surfaces
Rinse salt off the hull, topsides, hardware, rails, and canvas. Then clean and protect the surfaces that take the most abuse. A good wash and dry before storage helps prevent mold and mildew and gives you a chance to spot staining, corrosion, or cracked caulk while it is still a small fix.
Dry everything completely
Open lockers, lift cushions, and make sure the bilge is dry before sealing the boat up. Use moisture absorbers where needed. The trick is to think like water: under cushions, inside transom lockers, beneath floor panels, and in the corners nobody checks until spring.
Step 3: stabilize the fuel and circulate it through the system
- Check the current fuel level.
- Add the correct amount of stabilizer.
- Run the engine long enough to move treated fuel through the system.
Untreated fuel is one of the easiest ways to create a spring headache.
Fill the tank to the recommended level
Many boats are stored with the tank nearly full to reduce condensation. For ethanol-blended fuel, that can help limit water-related trouble. Still, follow your manufacturer guidance and storage plan rather than copying somebody else’s habit.
Add fuel stabilizer
Measure the stabilizer for the amount of fuel actually in the tank. Use a marine product intended for storage. Guessing here is like eyeballing medicine, close is not really good enough.
Run the engine long enough to move treated fuel through
Run the engine for several minutes so treated fuel reaches injectors, carburetors, lines, and filters. The standard advice is to run the engine after adding stabilizer, otherwise most of the protection stays in the tank and never reaches the parts that need it.
Step 4: change oil, filters, and drive fluids
- Warm the engine if required by the service procedure.
- Change oil and the oil filter.
- Replace fuel filtration and inspect drive fluids.
Old fluids sitting all winter are a bad deal.
Change the engine oil and oil filter
Change the engine oil at season’s end or by service interval, whichever comes first. Old oil holds contaminants and moisture. A lot of service guides still point to 100 hours or once a season as the basic rhythm, with earlier service during break-in on new engines.
Replace the fuel filter or water-separating filter
Swap the filter before storage so water or debris is not left sitting in the system. If you find visible contamination, stop and deal with it now instead of hoping it somehow improves over winter.
Check and service lower unit or transmission fluid
Look closely at gear lube or transmission fluid. Milky fluid often means water intrusion. That is not a note for later. That is a fix-now warning.
Step 5: protect the engine and cooling system
- Confirm your cooling-system type.
- Flush and drain per the manual.
- Add marine antifreeze where required.
- Preserve the engine if the manufacturer calls for it.
This is the part most owners mean when talking about winterization.
Know whether your engine is raw-water cooled or closed cooled
Raw-water systems pull outside water directly through parts of the cooling path. Closed-cooled systems circulate coolant internally, but still have raw-water components that need attention. Knowing which one you have changes everything.
Flush and drain where required
Flush salt and sediment out first, then drain the correct points in the system. Missing one low drain can undo the whole job. If your setup is more involved, this is exactly where a dockside service team can save you time.
Add marine antifreeze where your system calls for it
Use marine/RV antifreeze only where your manual specifies. Non-toxic antifreeze is common for protected systems, often in -50°F or -100°F versions. Do not treat pink fluid like a magic shortcut.
Fog or preserve the engine if recommended
Some engines require fogging, which coats internal parts with protective oil during storage. Some modern engines use different procedures. Manual first, always.
Step 6: drain and protect every onboard water system
- Drain stored freshwater.
- Run marine antifreeze through each protected system as required.
- Double-check the small accessories people forget.
On larger boats, the surprise problem is often a small line, not the main tank.
Empty the freshwater tank and water heater
Drain the freshwater tank and water heater, and bypass components if your setup requires it. Any place water sits long-term can become a freeze risk or a smell problem.
Winterize sinks, showers, heads, and sumps
Run marine antifreeze through faucets, pumps, drains, shower sumps, heads, and macerators if installed. Protect the drains too, not just the supply side.
Don’t Forget livewells, washdowns, and ice makers
These are easy to skip because they are not used every trip. But missed washdown pumps, ice maker feeds, and livewell plumbing are classic spring surprises.
Step 7: care for batteries, electronics, and moving parts
- Fully charge the batteries.
- Disconnect, remove, or maintain them properly.
- Power down electronics and lubricate hardware.
These systems quietly degrade when ignored.
Fully charge and disconnect or maintain the batteries
Charge batteries fully before storage. Then disconnect them, remove them if appropriate, or place them on an approved maintenance charger. Clean the terminals and check connections while you are there.
Power down and protect electronics
Shut down nonessential systems, check for parasitic draws, and remove portable electronics and valuables. If you want a broader refresher on the habits that keep boats reliable year-round, this guide to keeping up with routine care in Southwest Florida is worth bookmarking.
Lubricate fittings, hinges, cables, and seals
Lubricate hinges, latches, steering points, and control linkages with the correct product. While doing that, check for stiff movement, cracked hoses, and worn seals.
Step 8: prep the hull, bilge, trailer, and storage setup
- Leave the bilge clean and dry.
- Inspect the trailer if your boat uses one.
- Set the boat up so water sheds and air moves.
Clean the bilge and confirm it’s dry
A dirty bilge holds odors, moisture, and corrosion. Clean it, dry it, and confirm pumps and float switches are in good shape before storage.
If your boat sits on a trailer, inspect it now
Inspect tires, bearings, brakes, lights, wiring, winch straps, and the frame. Spring is a terrible time to discover trailer trouble on launch morning.
Set the boat up for drainage and airflow
Support the cover so rainwater runs off, not into low spots. Open selected lockers for airflow. A sagging cover is like a beach umbrella turned inside out, technically still there, but no longer helping.
Step 9: cover the boat the right way for storage
- Choose a breathable, well-fitted cover or shrink wrap.
- Support it properly.
- Check it after storms.
Choose a breathable, well-fitted cover or shrink wrap
A custom cover usually gives you better reusable protection. Shrink wrap can work well too when vented and supported correctly. Loose tarps are usually trouble.
Prevent water pooling and trapped moisture
Support poles, vents, and periodic checks matter. A cover should keep weather out without trapping damp air in.
Common mistakes that cause expensive spring problems
The biggest mistakes are predictable: skipping the manual, leaving fuel untreated, forgetting an accessory water line, assuming South Florida never gets cold enough to matter, and sealing up a damp boat. Another common miss is doing only the engine and ignoring the plumbing, batteries, and bilge.
Troubleshooting: what to do if something seems off during winterizing
When something looks wrong, stop and deal with it before storage. Winterizing is not just prep work. It is also inspection time.
Milky gear lube, rusty water, or metal in fluids
Milky lube suggests water intrusion. Rusty water or metal in drained fluids can point to corrosion or internal wear. These are repair issues, not “keep an eye on it” issues.
The engine won’t stay running long enough to circulate treated fuel
Check the obvious items first, fuel supply, battery charge, and emergency shutoff position if applicable. If it still will not run correctly, do not force the process. Fix the running issue first.
You’re Not sure every system got drained
Go back through the manual and your checklist one system at a time. Pay special attention to washdowns, livewells, air conditioning circuits, transom showers, and water heaters. Guessing is expensive.
What to expect after you winterize a boat
Once the job is done, your boat should be clean, dry, protected, and boring. That is the goal. No standing water, no food aboard, no untreated fuel, no battery drama, no mystery moisture building under a cover.
During storage, check on it after heavy rain, strong wind, or a cold snap. Make sure the cover is still shedding water, the bilge is staying dry, and ventilation has not been blocked.
Next step: do one fast check today
Pull out your owner’s manual and make a system-by-system checklist today. That one move turns winterizing from a vague marina chore into a straightforward job, and it is usually enough to get the whole process started.
Frequently asked questions
Do you need to winterize a boat in Southwest Florida?
Yes, especially if the boat will sit unused for a while. Freeze risk is lower than in northern climates, but stale fuel, moisture, mildew, corrosion, and occasional cold snaps still make winter prep worth doing.
How long does it take to winterize a boat?
A simple boat can take a few hours. A larger 25- to 55-foot boat with twin engines, generator, plumbing, and extra systems can take much longer, especially if you are cleaning, servicing fluids, and covering it properly.
Should the fuel tank be full for storage?
Often, yes, many boats are stored nearly full to reduce condensation. But your exact target should follow your engine and fuel-system guidance.
Can you use automotive antifreeze in a boat?
No, not for potable water systems or general marine winterizing steps. Use marine/RV antifreeze where your manual calls for it.
What is the most commonly missed part of winterizing?
Small water systems. Washdowns, livewells, ice makers, transom showers, sumps, and accessory pumps get forgotten all the time, and that is where a lot of annoying damage starts.