
A good boat day can get derailed before you even clear the no-wake zone, and that’s exactly why a boat safety checklist matters. If you keep your boat in Marco Island, run up through Naples, or point toward Bonita Springs, a fast pre-departure routine saves time, avoids dumb problems, and gets you off the dock with a lot more confidence.
What you’ll need before you start
Before you touch a switch or open an engine hatch, get your basics in one place. Pull up your checklist on your phone, or use a printed copy like this seasonal boating checklist if you want something easy to reuse. Have your keys, registration, insurance info, and charged electronics ready so you’re not digging through drawers while guests ask if it’s time to go.
Give yourself a few quiet minutes before departure. That part sounds minor, but it’s not. Most missed items happen when the dock turns into a social hour and the prep gets rushed.
Step 1: start with your float plan and day-of details
- Start with the big picture before you check gear.
- Lock in the route, timing, and who’s onboard.
- Make sure the trip still makes sense for conditions that day.
A float plan doesn’t need to be fancy. It just needs to answer a few basic questions before lines come off.
Confirm where you’re going and when you expect to be back
If you’re cruising Naples Bay for lunch, that’s a very different day from running offshore or heading north toward Bonita Springs for a longer ride. Set a rough route, estimate how long you’ll be out, and decide if fuel, daylight, and weather all support the plan.
Be realistic about range and timing. That sunset run sounds great at the dock, but not if you’re threading back through a shallow pass later than expected.
Check the weather, tide, and local marine conditions
- Check the marine forecast.
- Look at radar and storm movement.
- Review wind, tide, and visibility.
- Pay attention to local passes and shallow areas.
Southwest Florida can turn on you fast, especially with afternoon storms. A calm morning in Marco Island doesn’t promise a calm run home. The catch is that tide and wind can make passes, sandbars, and skinny water feel very different from what you remember last weekend.
Share your float plan with someone on land
Text one trusted person the basics: where you’re going, who’s coming, what boat you’re on, and when you expect to return. Also say when that person should worry if you haven’t checked in.
Simple beats elaborate here. If your trip changes, send an update. Done.
Step 2: make sure everyone onboard is accounted for and ready
- Count everybody coming aboard.
- Match safety gear to actual passengers.
- Cover special needs before departure.
This is where a lot of casual oversights happen. Coolers show up, extra guests hop on, and suddenly the boat is carrying more people and gear than expected.
Count passengers and stay within capacity
Confirm the headcount before you leave, not after you idle out. On a 25 to 55 foot boat, overload often shows up less as dramatic instability and more as poor balance, slower planing, and a cluttered deck.
Weight distribution matters too. A few extra bags, a full cooler, and water toys can stack up fast, especially if most of it lands in one area.
Fit life jackets for every person before departure
A PFD is just a personal flotation device, in plain English, a life jacket. Make sure you have the right number, right sizes, and that each one is easy to grab. “Somewhere onboard” is not the same as ready.
This deserves real attention because 87% of drowning victims in recreational boating accidents were not wearing a life jacket. Keep jackets accessible, visible, and fitted before you leave the dock.
Account for kids, older guests, and non-swimmers
Set up seats and gear for anybody who may need extra stability or help moving around. That means properly sized life jackets, easy handholds, and a spot away from busy boarding areas.
Comfort matters more than people admit. If a jacket fits badly, it’s less likely to stay on.
Give a quick safety talk before leaving the dock
- Point out life jackets.
- Show the fire extinguisher.
- Explain the head.
- Mention what not to touch.
- Cover man overboard basics.
Keep it short and useful. Think of it like the two-minute version before takeoff. Nobody wants a speech, but everybody benefits from knowing where things are before there’s a problem.
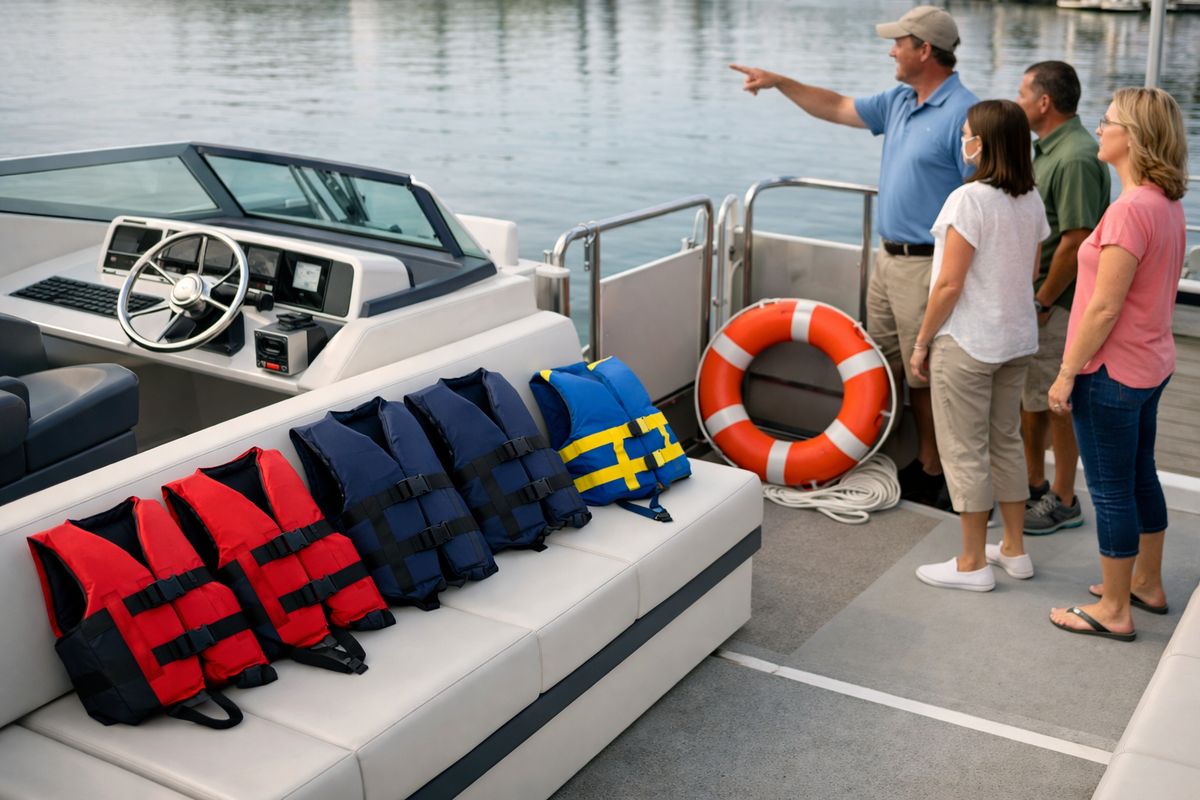
Step 3: check all required safety gear
- Verify what’s legally required for your boat size.
- Make sure it’s current and accessible.
- Replace anything expired, missing, or blocked.
This is the core of any boat safety checklist. It also happens to be where the most annoying surprises show up.
Verify fire extinguishers are onboard, charged, and accessible
Check that you have the right number for your vessel length and setup, then confirm the gauge shows charged. Also make sure you can reach each extinguisher without unloading half a locker.
If it’s buried behind dock lines, towels, and cleaning supplies, it’s not really accessible.
Confirm visual distress signals are current and dry
Inspect your flares or other approved distress signals and check expiration dates. Boats 16 feet to less than 26 feet generally need approved day and night signals, and bigger boats still need those items easy to reach, not just technically onboard.
Dry and current matters. Expired flares are dock trash, not safety gear.
Test your horn, whistle, or other sound-producing device
Give your horn or whistle a quick test before departure. It’s a small check, but it matters in fog, traffic, or any moment when you need to signal another boater fast.
For vessels under 39.4 feet, an efficient sound device is required under Coast Guard rules.
Check throwable flotation and other required equipment
Confirm your throwable device, anchor gear, navigation lights, and any placards or gear required for your boat’s length. Federal minimums are a starting point, and local rules can go further.
If you want a broader view of recurring upkeep beyond departure day, it helps to keep a year-round owner checklist in mind, especially for boats that sit between outings.
Restock the first-aid kit and basic onboard tools
Open the kit and actually look inside. Replace used bandages, check antiseptic, add seasickness meds, gloves, a flashlight, spare batteries, and a few basic tools for small fixes.
This is the stuff that handles cuts, loose hardware, and little problems before they become trip-ending problems.
Step 4: inspect your boat’s mechanical systems
- Check fuel and fluids.
- Look for leaks or corrosion.
- Test the systems that keep water out and power on.
Mechanical issues don’t always announce themselves dramatically. Sometimes it’s just a smell, a drip, or a pump that stays silent when it shouldn’t.
Check fuel level, range, and fuel system condition
Confirm enough fuel for the trip, plus reserve. Don’t guess. Guessing fuel burn is like trusting your phone battery at 3 percent and assuming it’ll last through dinner.
Look for fuel smells, leaks, or loose fittings before startup. If something smells off, stop there.
Inspect the engine room or machinery space
Open up and do a fast visual scan. Check belts, hoses, fluid levels, corrosion, and anything that looks freshly wet or newly out of place.
For coastal boats, this check matters even more because salt speeds up wear in ways that aren’t always obvious at first glance. That’s why it helps to understand what salt air and saltwater change over time.
Test the battery switch, bilge pumps, and blowers
Turn on the battery switch and confirm power where you expect it. Test the bilge pump, which removes unwanted water from the boat, and the blower, which helps clear fumes from enclosed spaces.
A pump that won’t run at the dock is not going to get more cooperative offshore. The same goes for weak batteries and dead panels.
Confirm steering, throttle, and shift are smooth
Cycle your controls while still secured at the dock. You’re looking for stiffness, lag, grinding, or anything that feels different from normal.
Trust that instinct. If the controls feel wrong, something probably is.
Look over hoses, clamps, and through-hulls
Through-hulls are simply the openings that let water systems pass through the hull. Check hoses, clamps, and fittings near the waterline for corrosion, drips, or looseness.
A quick glance here can prevent the kind of leak that ruins a perfectly good day.
Step 5: test navigation, communication, and visibility gear
- Power up nav electronics.
- Test communication tools.
- Clear your view from the helm.
A boat that runs fine still isn’t ready if you can’t navigate clearly or call for help when needed.
Power up GPS, chartplotter, and depth sounder
Turn on your electronics before departure and make sure positions, charts, and depth readings look normal. Around Southwest Florida, depth matters a lot more than people think, especially outside marked channels and near shifting shoals.
Test your VHF radio and charged backup devices
VHF is your marine radio. Test it, confirm channels work, and keep a charged phone or handheld backup in a waterproof case.
That matters because operator inattention and improper lookout stay near the top of accident causes, and good communication helps when traffic gets messy or visibility drops.
Check navigation lights before sunset departures or late returns
Test bow, stern, anchor, and other needed lights before you leave if there’s any chance you’ll be out late. It’s a lot better to find a burned-out bulb at the dock than halfway back from Naples after dinner.
Make sure your windshield, cameras, and sightlines are clear
Wipe off salt spray, move bags and towels, and clear anything blocking your view from the helm. The fix is simple, but the payoff is huge.
Poor visibility plus distraction is how little problems become expensive ones.
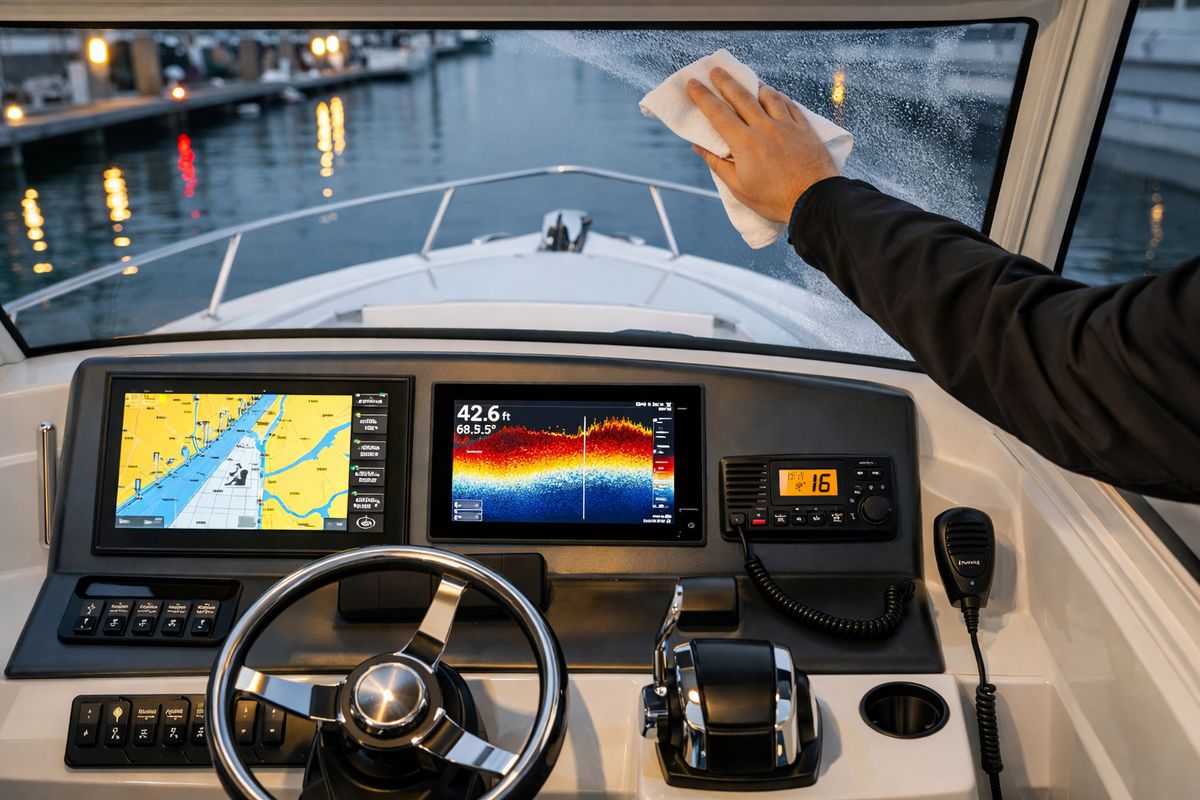
Step 6: do a final deck, dock, and departure walk-through
- Make one last pass around the boat.
- Secure anything loose.
- Confirm who’s driving and who’s watching.
This is the last chance to catch the dumb stuff. Take it.
Secure lines, fenders, hatches, and loose gear
Stow anything that can slide, bang, or trip somebody once you get moving. A clean deck makes departure smoother and gives everybody room to settle in without stepping over gear.
Check swim ladders, doors, and boarding areas
Make sure ladders are up or positioned correctly, doors are secured, and boarding gates are set for departure. Right after leaving the dock is a bad time to realize something wasn’t latched.
Confirm a sober operator and assign one extra set of eyes
Pick one person at the helm and one person to help watch during departure. No gray area. Alcohol has no place here, especially since it contributes to 20% of boating deaths.
Busy marina traffic around Marco Island is not the spot for distraction, drinks, or both.
Start the engines and watch for anything unusual
Start up while still tied off and pause for a minute. Listen for alarms, rough idle, odd vibration, warning lights, or smoke.
That one-minute pause can save you from spending the afternoon waiting on a tow.
Troubleshooting common pre-departure issues
Dead battery or electronics that won’t power up
Check the battery switch first. Then look for loose terminals, poor charge, or a tripped breaker. If shore power or a service call is the smart fix, take it. Forcing a departure with weak power usually ends with more hassle and a higher ownership bill than expected.
Engine won’t start or runs rough at idle
Check the kill switch, fuel supply, alarms, and anything visibly leaking. If the engine starts but sounds rough, don’t talk yourself into it. Stay put until the issue is clear.
Missing, expired, or blocked safety gear
No flare, no life jacket, no charged extinguisher, no departure. The checklist isn’t done until the gear is present, current, and reachable.
Bad weather moving in faster than expected
Postpone. Honestly, that’s the cleanest answer. A delayed boat day beats a sketchy return through building weather every time.
What a completed boat safety checklist should leave you with
A completed checklist should leave you with a boat that’s legal, ready, and easy to enjoy. Not perfect, just ready. That’s the goal.
If you’ve checked the plan, the people, the gear, the systems, and the final walk-through, you leave the dock without that nagging feeling that something important got missed.
Next step: turn this into a 10-minute routine
The trick is repetition. Save the checklist to your phone, print it, keep it in a helm drawer, and use the same order every time. If you hand off details to a captain, mate, or management service, the same routine still works because clear expectations catch missed steps.
Try one thing before your next departure: use this checklist from top to bottom without skipping ahead. It only takes a few minutes, and it changes the whole feel of the day.
Frequently asked questions
How long should a boat safety checklist take?
About 10 minutes once it becomes routine. A little longer if the boat has been sitting, you’re heading offshore, or you’re loading extra guests and gear.
What is the most important item on a boat safety checklist?
Life jackets. More specifically, life jackets that fit, are easy to reach, and are actually worn when conditions call for it.
Do you need to check safety gear every single trip?
Yes. Gear expires, gets moved, gets borrowed, or ends up buried under storage. A quick check every trip is faster than dealing with a problem on the water.
Should you cancel a trip for small mechanical issues?
If the issue affects starting, steering, shifting, bilge pumping, fuel integrity, or visibility, stay at the dock. Small mechanical issues have a bad habit of getting bigger once you leave.
Is a cell phone enough for communication on the water?
No. A charged phone helps, but a VHF radio is better for marine communication, especially in traffic, low visibility, or emergency situations.
Does boat size change the checklist?
Yes. Requirements for extinguishers, distress signals, throwable devices, and placards can change with vessel length and setup, so your checklist should match your boat, not somebody else’s.